
In This Article
A dishwasher installation kit with braided stainless steel supply line is a bundled set of parts that connects your dishwasher to the hot-water shutoff valve under the sink. It usually includes a flexible stainless-braided hose with 3/8-inch compression ends, one or two adapter elbows, and sometimes a power cord, wire nuts, and a clamp.
Here’s the unglamorous truth: the supply hose is the only part of your dishwasher that sits under constant water pressure, 24 hours a day, even when the machine is asleep. A cheap hose is the cheapest insurance policy you’ll ever skip. A burst line turns a $30 part into a flooring estimate. 💧
This guide covers seven real kits across budget, mid-range, and premium tiers, plus everything the box never explains. We’ll look at the dishwasher elbow fitting that quietly causes most drips and where plumber’s tape belongs (and where it doesn’t). We’ll also cover the drain side, because a high loop drain hose is what keeps dirty sink water out of your tub, and plumbers have a code-mandated cousin called an air gap. Then we’ll troubleshoot the two repairs people hit right after install: a leaking door and a cracked spray arm.
Quick Comparison: 7 Dishwasher Installation Kits at a Glance
| Kit | Hose Length | Standout | Price Range* | Best For |
|---|---|---|---|---|
| Eastman 41045 Universal Dishwasher Installation Kit | 6 ft | Includes two elbow styles | Roughly $20-$30 | First-time DIYers who aren’t sure which inlet they have |
| Eastman 8-Foot Dishwasher Installation Kit | 8 ft (96 in) | Power cord and clamp included | Roughly $25-$45 | Full replacements where the cord is also tired |
| Eastman 69008 12-Foot Dishwasher Installation Kit | 12 ft | Longest reach | Roughly $30-$50 | Island or relocated dishwashers |
| Hydro Master 72-Inch Dishwasher Connector with Elbow | 6 ft | Elbow-ready connector | Roughly $15-$30 | Budget-conscious swaps |
| Smart Choice 6-Foot Stainless Steel Dishwasher Installation Kit | 6 ft | Rust and kink resistant | Budget tier, under ~$30 | Rental and flip projects |
| Kelaro 10-Foot Universal Dishwasher Hose Kit | 10 ft | Burst-proof, no-lead hose | Low-$30s | Longer runs, higher-rated listing |
| Bosch 00628346 Installation Set | Check listing | Genuine OEM | Roughly $25-$60 | Bosch owners who want factory-matched parts |
*Prices change constantly. Check current price before buying.
Looking at the table, the Eastman 41045 earns the value crown for most people because it covers both common elbow styles. If your dishwasher sits far from the shutoff valve, the Eastman 69008 or Kelaro 10-Foot justify the extra few dollars purely on reach. Budget hunters should note that the Hydro Master and Smart Choice kits trade extras for a lower entry price.
💬 Just one click — help others make better buying decisions too!😊
Top 7 Picks for a Dishwasher Installation Kit with Braided Stainless Steel Supply Line: Expert Analysis
1. Eastman 41045 Universal Dishwasher Installation Kit — best all-rounder with both elbows
The big idea here is hedging your bets. Dishwasher inlets aren’t standardized, so a kit that ships with both a 3/8-inch MIP elbow and a 3/4-inch FHT elbow saves you the dreaded second trip to the hardware store.
The 6-foot braided stainless line ends in 3/8-inch compression fittings, which match the most common under-sink shutoff valve. Six feet is enough for a standard dishwasher sitting next to the sink cabinet, with room to curve the hose gently rather than bending it hard behind the unit. The braided exterior is meant to shrug off the kinking and crimping that kills rubber lines in cramped cabinets.
Based on the spec comparison, this is the kit I’d steer a nervous beginner toward. The listing I found showed no customer ratings yet, so I can’t summarize reviewer sentiment for this exact part number. That’s worth knowing before you buy.
Pros:
- ✅ Two elbow styles in one box
- ✅ Standard 3/8-inch compression ends
- ✅ Braided exterior resists kinks
Cons:
- ❌ No power cord included
- ❌ No verified review pool found
Price: around the $20-$30 range. Solid value, especially given the elbow flexibility.
2. Eastman 8-Foot Dishwasher Installation Kit — power cord and clamp included
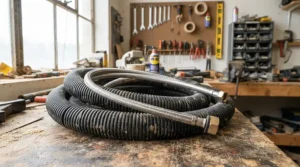
Think of this as the “everything in one bag” option. Beyond the 96-inch braided stainless hose, you get a 6-foot UL-listed power cord with a quick-connect harness, three wire nuts, and a stainless hose clamp.
Here’s what the spec sheet won’t spell out: the hose has a brass 3/4-inch FHT elbow on one end and a 3/8-inch compression fitting on the other. That means it suits dishwashers with a hose-thread inlet, so check your valve before ordering. The extra two feet of hose over a standard kit gives you slack for pulling the dishwasher out later without stressing the connection.
The listing doesn’t include an excess flow valve, a nice-to-have safety feature that automatically limits flow if a line fails. For most homes that’s acceptable, but cautious homeowners may want to add one separately. I couldn’t verify a deep review pool for this listing.
Pros:
- ✅ Cord, wire nuts, and clamp in the box
- ✅ Generous 8-foot reach
- ✅ Brass elbow feels sturdy
Cons:
- ❌ Hose-thread elbow only
- ❌ No excess flow valve
Price: around the $25-$45 range. Good value if you’d otherwise buy a cord separately.
3. Eastman 69008 12-Foot Dishwasher Installation Kit — longest reach for island layouts
Most dishwashers sit beside the sink. Some don’t: islands, peninsulas, and remodels that moved the machine across the room. That’s where twelve feet earns its keep.
The construction is a PVC core wrapped in braided nylon reinforcement, a clear vinyl shell, and a grade 304 stainless braid. That layered build is why a long hose doesn’t turn into a floppy garden-hose noodle. It also resists the corrosion that eats cheaper exteriors in damp cabinets.
Honest caveat: more hose means more to manage. Coil the excess in a loose, wide loop, never a tight one, and keep it clear of the drain line. On paper this kit is overkill for a standard install, and I wouldn’t buy it just because longer sounds safer.
Verified review sentiment wasn’t available for this exact listing, so I’m judging on specs only.
Pros:
- ✅ Reaches island and peninsula installs
- ✅ Layered grade 304 construction
- ✅ Room to slide the unit out
Cons:
- ❌ Excess hose needs careful coiling
- ❌ Overkill for standard layouts
Price: around the $30-$50 range. Worth it only if you need the reach.
4. Hydro Master 72-Inch Dishwasher Connector with Elbow — low-cost 6-foot connector
Sometimes you don’t need a kit; you need a hose. This 72-inch braided stainless connector comes with 3/8-inch compression ends and an elbow, so it’s the simplest swap for an aging line.
Seventy-two inches matches the length most manufacturers assume. That makes it the “just replace what’s there” choice when your wiring and drain hose are fine. It showed up in a curated roundup of supply lines I found, which is a nod to its popularity, though a roundup isn’t a substitute for verified customer reviews, and I wasn’t able to confirm ratings for this exact listing.
Pair it with a fresh rubber washer if your elbow uses one, and you’ve handled the most common cause of slow drips for a few dollars.
Pros:
- ✅ Elbow already attached
- ✅ Standard 6-foot length
- ✅ Light on the wallet
Cons:
- ❌ No power cord or clamp
- ❌ Reviews not verified
Price: around the $15-$30 range. Strong value for a straight swap.
5. Smart Choice 6-Foot Stainless Steel Dishwasher Installation Kit — budget kink-resistant braided hose
If you’re outfitting a rental or prepping a house to sell, this is the pragmatic pick. The listing highlights a rust- and kink-resistant braided hose, which matters more than it sounds in a cramped cabinet where hoses get pinched against pipes.
Six feet covers the average install, and a kit format means you’re not hunting for adapters. Check the exact contents on the listing before buying, because inclusions vary between seller bundles.
The reasoning for buying cheap here is sound: the hose is a commodity, and what matters is proper tightening, not brand prestige. Still, don’t confuse “budget” with “disposable.” Install it carefully and it should serve you as well as pricier options.
I couldn’t verify a substantial review pool for this specific kit.
Pros:
- ✅ Budget-friendly entry price
- ✅ Rust-resistant exterior
- ✅ Kit format simplifies sourcing
Cons:
- ❌ Contents vary by seller
- ❌ No verified reviews found
Price: under roughly $30 (check current price). Great for landlords on a spreadsheet.

6. Kelaro 10-Foot Universal Dishwasher Hose Kit — 10-foot reach with high listing ratings
This is the one pick where I could verify real buyer signals. At the time of research, a retailer listing showed a rating in the high-4-star range from a few hundred buyers, which is a respectable pool for a hardware item.
The kit is marketed as burst-proof, no-lead, premium stainless with 3/8-inch compression connections. Ten feet splits the difference between a standard run and the Eastman 12-footer, which is handy when the dishwasher sits one cabinet over from the shutoff.
What to weigh: the listing emphasizes the hose and compression ends, so confirm whether your dishwasher’s inlet needs a separate elbow. Reviewers on listings like this typically praise flexibility and fit, while the usual complaint is compatibility surprises, so measure first.
Pros:
- ✅ Strong buyer ratings on listing
- ✅ 10-foot reach for tricky layouts
- ✅ No-lead hose
Cons:
- ❌ Elbow needs may differ
- ❌ Pricier than short kits
Price: in the low-$30s. Fair value for the reach and rating.
7. Bosch 00628346 Installation Set — OEM pick for Bosch owners
Here’s the premium-by-pedigree option. This is a genuine OEM installation set, which means it’s engineered around Bosch’s own inlet design. Confirm exact contents on the listing, since Bosch kits vary by series.
The advantage of OEM isn’t magic; it’s fit. When the manufacturer designs the elbow and hose together, you skip the compatibility roulette that universal kits can introduce. If you own a Bosch, that peace of mind can beat saving a few dollars.
Prices I found varied widely between sellers (a single set ran from the mid-$20s on one listing to much more for multi-packs), and one listing showed out of stock. So shop around and verify what you’re getting. Review data wasn’t available for me to summarize.
Pros:
- ✅ Manufacturer-matched fit
- ✅ Less compatibility guesswork
- ✅ Good for warranty-conscious owners
Cons:
- ❌ Seller pricing varies widely
- ❌ Limited to Bosch models
Price: around the $25-$60 range depending on seller. Worth it for Bosch owners; skip it otherwise.
Specs and Value Snapshot
| Kit | Hose Length | Extras | Review Signal | Price Range |
|---|---|---|---|---|
| Eastman 41045 | 6 ft | MIP and FHT elbows | Not verified | $20-$30 |
| Eastman 8-Foot Kit | 8 ft | Cord, nuts, clamp | Not verified | $25-$45 |
| Eastman 69008 | 12 ft | Long-reach hose | Not verified | $30-$50 |
| Hydro Master 72-Inch | 6 ft | Elbow attached | Roundup mention only | $15-$30 |
| Smart Choice 6-Foot | 6 ft | Kit parts vary | Not verified | Under ~$30 |
| Kelaro 10-Foot | 10 ft | Compression ends | High-4-star listing average | Low-$30s |
| Bosch 00628346 | Check listing | OEM fit | Not verified | $25-$60 |
The pattern is clear: spending more buys reach or extras, not a fundamentally different hose. For most standard kitchens, the Eastman 41045 or Hydro Master handles the job, while the Eastman 8-Foot makes sense when you’re also replacing a worn cord. Pay extra only when your layout or a Bosch badge demands it.
How to Install Your Dishwasher Kit Step by Step (Without Flooding the Kitchen)
Installation is where a good kit becomes a leak-free kit. Here’s the sequence that keeps surprises out of your cabinet:
- Kill power and water. Switch off the dishwasher’s breaker, then close the under-sink hot-water stop valve.
- Identify the inlet. Check whether your dishwasher uses a hose-thread or tapered-thread inlet. Your manual settles this in seconds.
- Fit the elbow. Seat it squarely so the threads don’t cross. More on that below.
- Connect the hose. Run the braided line to the stop valve with the compression nut hand-tight, then a modest snug with a wrench. Over-tightening can distort the fitting and cause the very leak you’re avoiding.
- Route gently. Avoid sharp bends and keep the hose off the drain line and sharp edges.
- Handle the wiring safely. If your kit includes a power cord, connect it with the supplied wire nuts. If you’re unsure, hire an electrician.
- Test properly. Restore water, check every joint with a dry paper towel, run a full cycle, then re-check after 24 hours and again after a week.
The first 30 days are when slow weeps reveal themselves, so don’t shove the dishwasher into place and forget it. Leave the toe kick off for a few days if you can.
Dishwasher Elbow Fitting: The Small Part That Causes Big Leaks
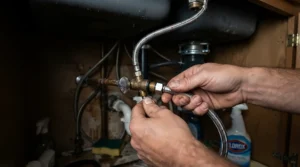
The dishwasher elbow fitting is the right-angle adapter that lets the hose turn sharply into the inlet valve without kinking. It’s small, brass, and responsible for a surprising share of install-day drips.
Two common types appear in kits. A 3/4-inch FHT (female hose thread) elbow screws onto a hose-thread inlet and seals against a rubber washer. A 3/8-inch MIP elbow threads into a tapered fitting and seals on the threads themselves. Mixing them up is the classic mistake: the wrong one will thread loosely, or not at all.
Check three things before tightening. First, confirm the washer is present and flat in a hose-thread elbow. Second, thread it by hand until it spins freely before using a wrench. Third, inspect for cross-threading, a shiny, uneven bite means back it out and restart.
If your kit’s elbow doesn’t match your inlet, don’t force it. A universal bundle like the Eastman 41045 that ships with both styles exists precisely for this moment.
Plumber’s Tape: Where It Goes and Where It Absolutely Doesn’t
Plumber’s tape is thin PTFE (Teflon) film wrapped around threads to fill microscopic gaps. Bob Vila’s guide to using plumber’s tape explains how it creates a barrier between mating threads. It’s helpful, but only in the right places.
Use it on tapered threads. A MIP-style dishwasher elbow fitting that threads into a tapered inlet seals on its threads, so a few wraps help. Wrap clockwise in the direction of the threads, so the tape doesn’t unravel as you tighten. Too much tape can gum up the joint and hurt the seal.
Skip it on compression connections. The nut on a compression fitting doesn’t seal the water; the ferrule does. Taping those threads is a classic way to make a joint worse. The same goes for any connection that seals against a rubber washer or O-ring, which includes most hose-thread elbows.
The decision rule is simple: if the threads do the sealing, tape them; if a washer, ferrule, or O-ring does the sealing, leave the tape in the drawer. Keep a roll around, since it costs next to nothing, but let the fitting type decide.
High Loop Drain Hose: Setup, Code Rules, and the Air Gap Question
A high loop drain hose is simply your dishwasher’s drain line routed upward, secured near the underside of the countertop before it drops to the disposal or drain. It’s gravity’s bouncer. It stops dirty sink water from siphoning back into your clean dishes.
Manufacturers generally require it, but local code may demand more. As Hunker’s drain installation guide notes, the Uniform Plumbing Code requires an air gap, while the International Plumbing Code allows a high loop instead. Some states have required air gaps, but codes change, so verify with your local building department.
Practical setup tips:
- Secure the loop as high as possible under the counter using a clamp or strap, not just a loose zip tie.
- Check manual heights. Instructions often specify minimum connection heights above the floor, and figures vary by brand.
- Keep it separate. Don’t connect other drain lines to the dishwasher hose.
Most installation kits focus on the supply side, so you may need a drain hose separately. Budget for it, and don’t let a limp, sagging drain line undo your careful supply install.
Dishwasher Door Gasket Seal Replacement for Leaking Doors
If water escapes around the door during a cycle, suspect the gasket first. For dishwasher door gasket seal replacement for leaking doors, the key is knowing which seal failed. Some dishwashers have a bottom door seal, others a perimeter tub gasket, and some have both.
Reading the clues helps. Drips along the lower door edge usually point to the bottom seal. Water pooling underneath the unit typically isn’t the gasket at all. That’s more likely a hose connection, pump seal, or tub crack, so pull the kick plate and look.
Replacement is gentler than most repairs. Per Appliance Parts Pros’ bottom door seal tutorial, you need only basic tools: a Phillips screwdriver, needle-nose pliers, towels, and gloves. Pull out the old seal, clean the channel, and press in the new one, matching its orientation. Warm water can soften stiff rubber for easier seating, and one OEM listing recommends keeping the door closed for several hours afterward so it seats properly.
Buy by model number, not by guesswork. If it still leaks after replacement, suspect a hinge alignment problem or a cracked tub. There’s no fixed replacement schedule; swap it when it tears, hardens, or stops springing back.
Replacement Dishwasher Spray Arm for Frigidaire
A cracked or melted spray arm gives you the classic symptom of cloudy glasses and gritty plates despite a full cycle. For a replacement dishwasher spray arm for Frigidaire, the most common part number I found is the lower arm 5304517203, which fits Frigidaire, Crosley, Kenmore, Gibson, Kelvinator, Tappan, and Westinghouse models, replacing older numbers such as 154568001 and 5304506526.
Why do they fail? Reviewers on parts sites repeatedly describe an arm that fell off its support and melted against the heating element, so check yours for warping before blaming the pump. A related variant, 5304518927, includes a heat shield, and the upper arm is a separate part (5304506516). The support underneath is a third part (5304532235) worth inspecting while you’re in there.
Installation is refreshingly low-drama: remove the lower rack, snap off the old arm, snap on the new one, and confirm it spins freely. Reviewers describe it as a job of a couple of minutes to under half an hour.
Genuine OEM arms run roughly $40-$50 at retailers I checked, while aftermarket versions sit around $12-$20. Always verify your exact model number before ordering.

How to Choose a Dishwasher Installation Kit with Braided Stainless Steel Supply Line
- Measure the run. Measure from the shutoff valve to the inlet and add a couple of feet for slack. Six feet fits most; go longer only for islands.
- Match the inlet. Confirm whether your dishwasher uses a hose-thread or tapered-thread elbow. This single check prevents most returns.
- Check the shutoff valve. Most kits assume 3/8-inch compression, but older valves differ, so look before buying.
- Decide on electrical extras. If your cord is frayed, pick a kit with a cord and wire nuts, like the Eastman 8-Foot.
- Look at construction. A layered build (PVC core, braided reinforcement, grade 304 stainless exterior) tells you more than a “premium” label.
- Weigh brand fit. Bosch owners may prefer OEM; everyone else can choose on length and included parts.
Common Mistakes When Buying and Installing a Dishwasher Kit
Reusing the old hose. The hose is cheap; a leak isn’t. Replace it whenever you replace the dishwasher.
Taping compression threads. As covered earlier, the ferrule seals, not the threads.
Ignoring the drain side. A flawless supply line does nothing for a missing high loop drain hose.
Over-tightening. More torque doesn’t mean more seal; it means a distorted fitting.
Assuming “universal” means “fits everything.” Check the elbow type and valve size against your manual.
Skipping the follow-up check. Drips often appear days later. Put a note on your calendar for a week out.
Braided Stainless Steel vs Rubber Supply Hoses
| Feature | Braided Stainless | Basic Rubber Hose |
|---|---|---|
| Kink/crimp resistance | High | Lower |
| Corrosion resistance | Strong (grade 304 braid) | Not applicable, but rubber degrades |
| Flexibility in tight cabinets | Good | Varies |
| Upfront cost | Modest, roughly $15-$50 | Often cheaper |
| Best for | Most homes, long-term use | Temporary, low-stakes setups |
The takeaway is straightforward: the extra upfront cost of braided stainless is small relative to the water damage it helps prevent. Rubber isn’t “bad,” but it’s the weaker link in a system that runs under pressure around the clock. For anything permanent, braided wins.
Long-Term Cost and Maintenance
Ownership math here is delightfully boring. A kit in the $20-$40 range that serves a decade works out to a few dollars a year. A spray arm swap costs roughly $12-$50, and a gasket depends on your model. Compare that to a single flooring repair.
A simple maintenance rhythm helps:
- Every six months: Peek under the sink for dampness, corrosion, or weeping fittings.
- Yearly: Check the high loop is still secure and the hose isn’t rubbing a pipe.
- When symptoms appear: Cloudy dishes mean inspect the spray arm; leaks at the door mean inspect the gasket.
Replace parts when they fail, not on a calendar. But replace the supply hose when you install a new dishwasher; it’s the cheapest moment to do it.
Frequently Asked Questions
❓ How long should a dishwasher installation kit hose be?
❓ Does a dishwasher installation kit include a drain hose?
❓ Where can I buy the right elbow if mine doesn't fit?
❓ Can I use the same kit for any dishwasher brand?
❓ Are braided stainless steel supply lines worth the extra cost?
Conclusion
Let’s recap the whole picture. A dishwasher installation kit with braided stainless steel supply line is a small purchase that protects a big investment, but only if you match it to your layout and install it with care. Pick the Eastman 41045 if you want elbow flexibility, the Eastman 8-Foot if the cord needs replacing too, the Eastman 69008 or Kelaro 10-Foot for long runs, and the Hydro Master or Smart Choice kits when budget leads. Bosch owners should seriously consider the Bosch 00628346.
Then finish the job properly: the right dishwasher elbow fitting, plumber’s tape only where threads do the sealing, a secure high loop drain hose, and a quick check of your gasket and spray arm. Do those four things and your dishwasher will quietly do its job for years.
✨ Ready to Upgrade Your Install?
🔍 Check current pricing and availability on the kits above, and choose the one that matches your layout. A few smart dollars today can save you a soaked cabinet tomorrow. 🚿
Recommended for You
- Quiet Dishwasher Under 45 DBA For Open-Concept Kitchens: 7 Best 2026
- Drying Dishwasher For Plastics And Tupperware: 7 Proven Picks 2026
- Fast Cycle Dishwasher With 1-Hour Wash: 7 Best Picks (2026)
Disclaimer: This article contains affiliate links. As an Amazon Associate, I earn from qualifying purchases. If you purchase products through these links, we may earn a small commission at no additional cost to you.
✨ Found this helpful? Share it with your friends! 💬🤗
